Yeah and I built a few large ones like this...
So I figured that this simple concrete assignment should be a piece of cake right? I was wrong... It posed multiple problems that I hadn't ever had with rock and liner ponds and features. Mostly CONCRETE
So here is my process and I wanted to document it so others could build similar if desired.
I bought 1" thick foam insulation sheeting and cut out the form that I had designed in autocad.
I then used my copper soldering skills to build the spillway piping, I had originally planned to used 1" pipe throughout the entire project, however I ordered a pump that had 1/2" outlet so I knew I would have to drop to 1/2" towards the bottom, I found out to have 3" spacing on my copper pipe I would have to do almost the entire thing in 1/2" except for the three reducers that stick out of the form were 1/2" to 1" reducers. These fittings barely fit into my 3" spacing of the spillways, had to take 3 trips to the hardware store to get all the right pieces but it all worked out.
Here is the pump I purchased... PonicsPump PP12005: 120 GPH Submersible Pump with 5' Cord - 6W
I finished the copper and being the boy in me, I had to test it out... I think it worked pretty well!
So the next day came and I started taping the form pieces together, took about an hour to build the form after it was cut.
So I finished the outside and inside molds and then cut holes for the copper to stick through and make the spillways stick out of the concrete.
I decided at this point that I really didn't want the cord for the pump to go over the top of the wall, so I got a piece of 1" polyurethane pipe and placed it so it would be above the water line and had it go through both molds.
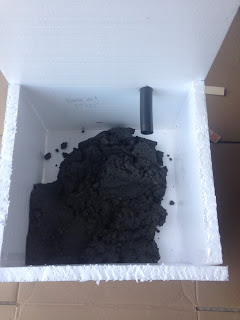
I started mixing the concrete! I used in total two 80 pound bags of Quickcrete concrete mix. We wanted it colored so we used quickcrete's coloring and went with charcoal. We mixed it a little heavy and used about 3/4 of the bottle for each bag of concrete.
You can really see the color here, against the driveway color. I really like how dark it looks.
Into the mold it goes!
I started by having the 2" above the bottom marked so I knew when my base had enough concrete, well as I filled the walls the bottom would rise, in the end right before I called it good enough I probably had 3" so I took an inch out and then added it to the very top of the walls.
Bag 1 gone and I panic because my walls arn't even halfway full...I take a 10 minute run to Lowes to buy my second bag of concrete and color, the color matched perfectly!
Here is the first 10" of height poured, front three walls finished.
So the inside form is supposed to be level with the outer form, well as we added more concrete to the back this happened and it kept rising, so I left it and kept going as I had concrete setting quickly
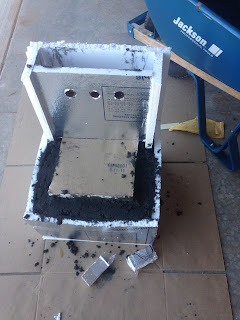
I got the back wall filled, it was supposed to go to the top of the form, but it was about 1" shy because of the form bulging on the sides, so I left it and tried to figure out how to keep my mold from bulging more.
I could hear the tape starting to fail so I took the packing tape and wrapped the entire thing, it held it together well.
So I poured on Friday morning, on Sunday evening I pulled the form off and this is the end product!
The water is dirty because I tested it then polished the copper spillways and the dust shavings fell into the water. I couldn't be more happy with how it turned out given my lack of much concrete water feature builds and building with foam insulation which wasn't as durable as it seemed in other blogs I read about online.
Hope you enjoyed my adventure! Below are the construction details that I created for this project


No comments:
Post a Comment